


I began to feel the need for a serger in the past few months because I started sewing more at home. It could also be because I am too impatient and lazy to zigzag seam ends with the sewing machine 🙂 Among other things, the serger works faster over the fabric and I love its clean-cut.
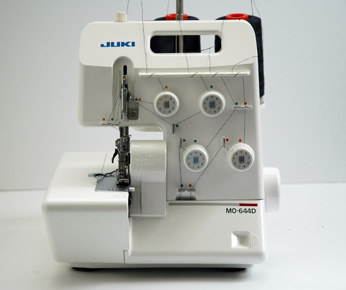
My sewing machine is a second-hand Pfaff but I decided to go for a first hand serger, which is also known as a overlock machine in this part of the world. I looked into Janome and Juki. In the end, I bought a Juki.
Getting a serger might seem overwhelming at first, at least it did to me once I opened the box. So many threads, needles, buttons, curves and turns all at once! Anyway, I went through the instruction manual, had some tips in class and I did quite a few trials at home. I am going to be discussing parts of the serger and their functions in the coming blog posts.
Parts of the Serger and Their Functions

– On the right side of my serger, I have the have the handwheel, the on/off button and the plug-in for the foot controller. The handwheel moves the two needles of the serger up and down. It is important to notice that the two needles are not on the same line so that you will not get confused when changing the needles. The left needle is lined higher than the right one on mine.

– On the left side of my serger, I have the differential feed adjusting knob. Mine starts from 0.7 and then goes to N (Neutral) and continues to 1.5 and to 2. The differential feed adjusts the feed dogs and so influences the gathering and stretching of your fabric. In some fabrics, this does not make much of difference. For instance, I tried it on linen and cotton and whether it was on 0.7 or 2 did not make such a difference. However, once I tried it on stretchy knit fabric, there was a huge difference. Below are the results, the one on the left is 0.7 and the one on the right is 1.5.
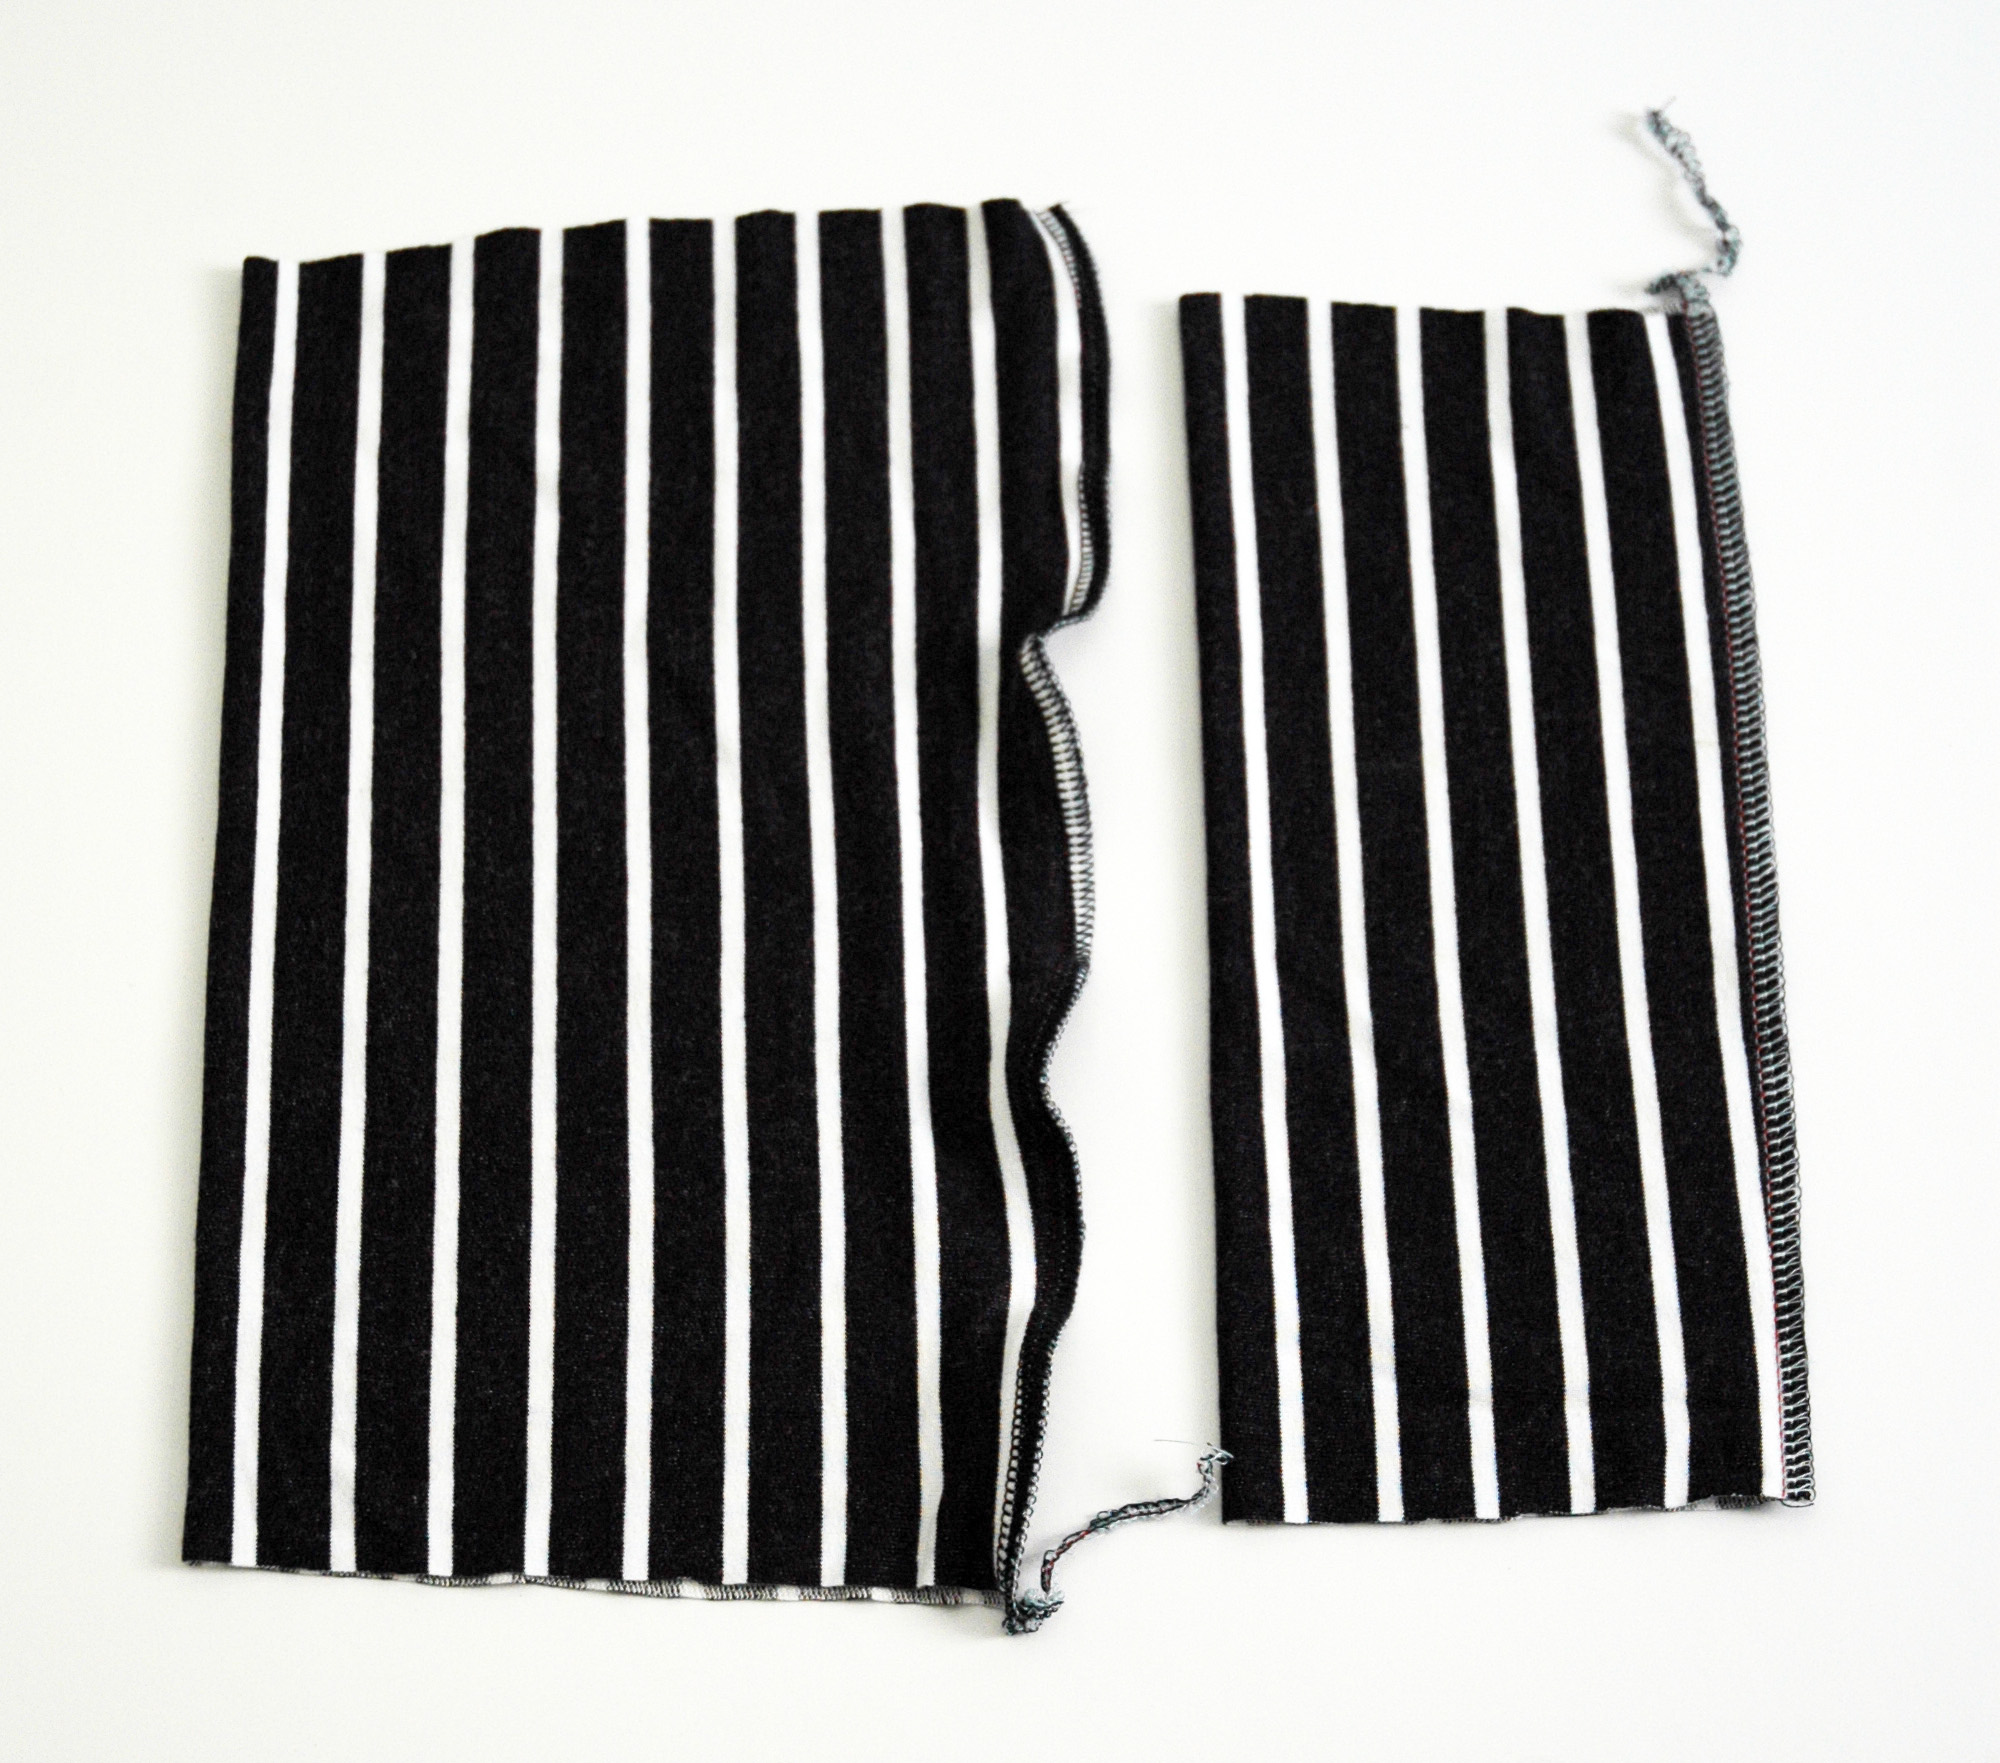


So at 0.7, the fabric end became wavy. The goal is of course to get nice and smooth ends so 1.5 worked better for this fabric.


When you open the cloth plate, you can see differential feed knob and just right next to it there is another smaller black knob. This is the stitch length adjusting knob. I tried the stitch length on 4 (on the left) and 1 (on the right) and below are the results. The bigger the number, the wider the stitches get.

If you want to have dense stitching, you will need to lower the number on your stitch length adjusting knob.
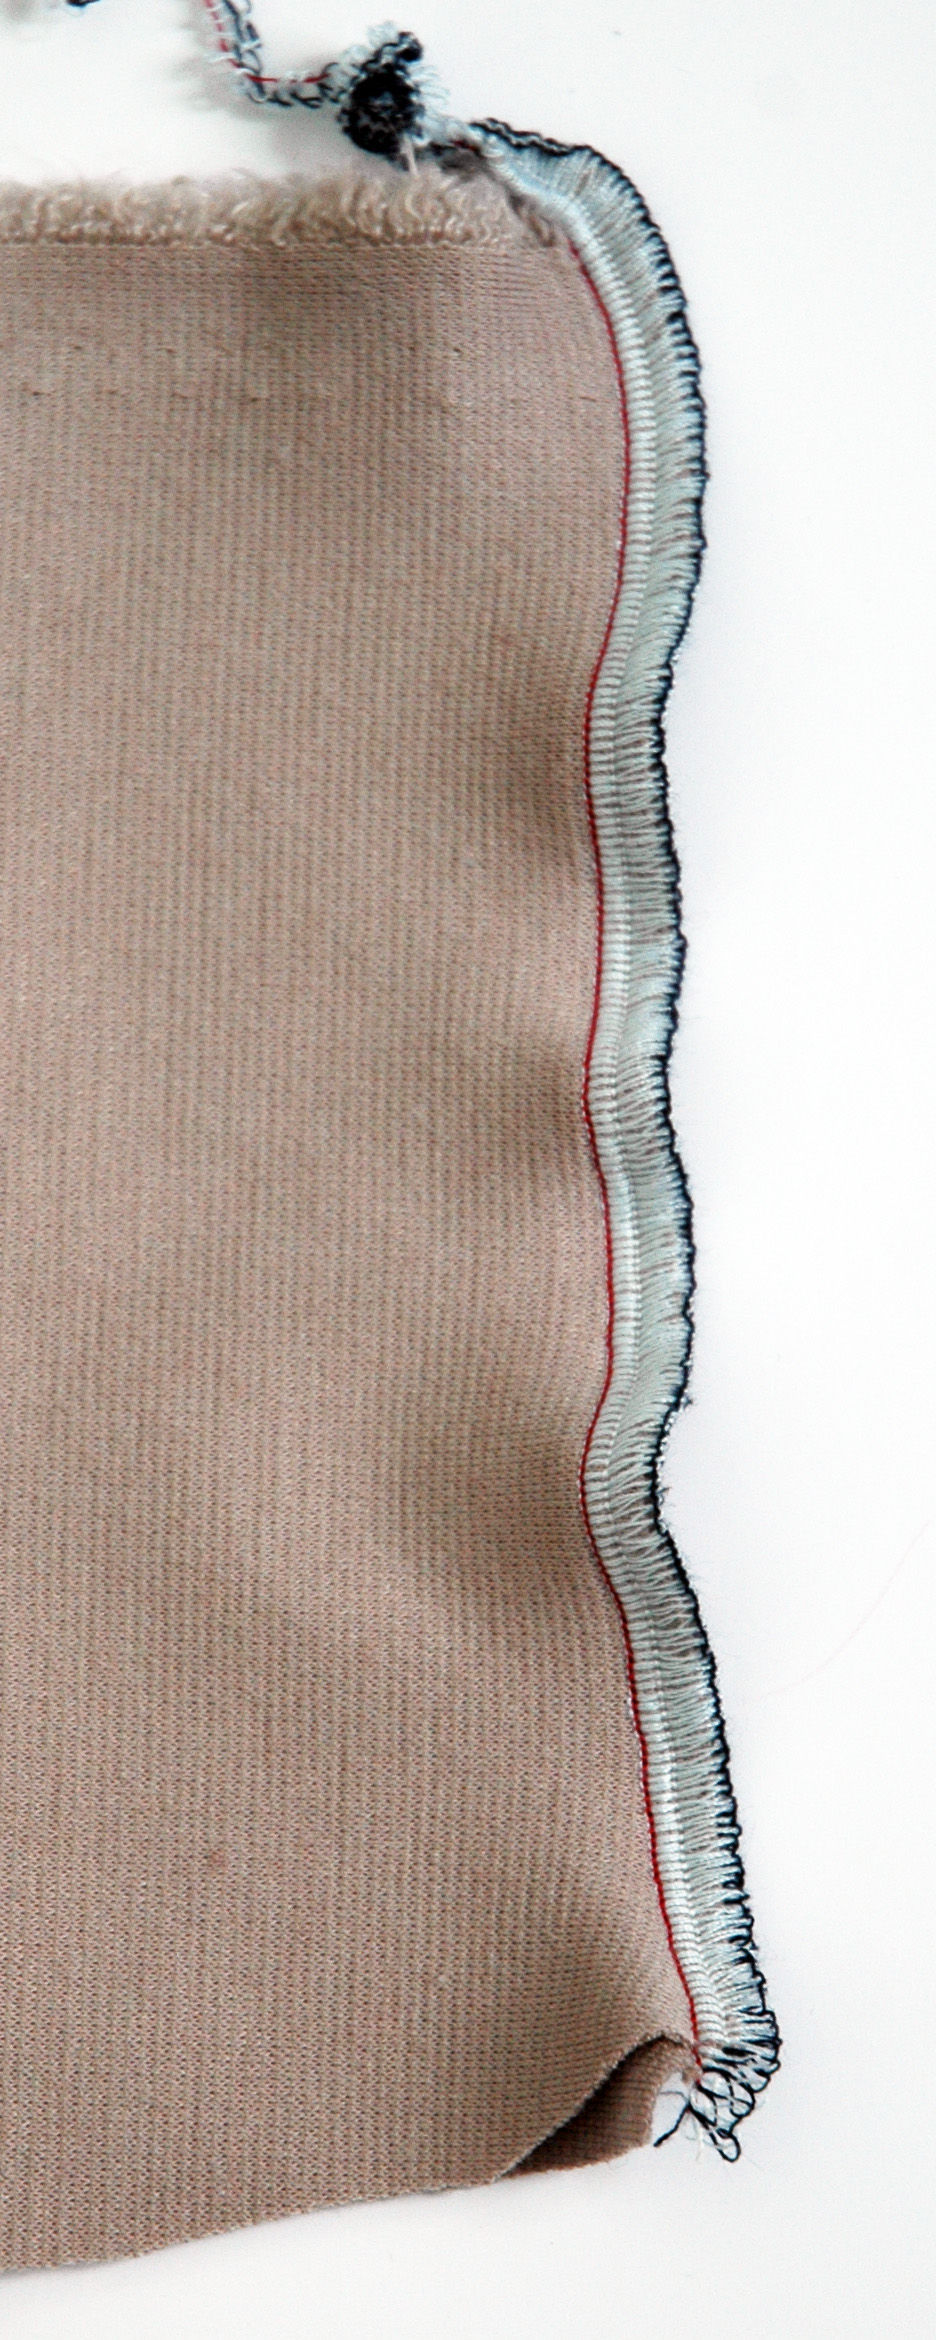
You will notice that dense stitching caused the fabric ends to get wavy. In this case, you will need to harmonize the differential feed with the stitch length. To correct this one, I moved the differential feed from N to 1.5 and this gave me a better result.

I’ll continue with some more tips on sergers on my next blog post. I’ll be happy to have any comments on tips that you discovered to be useful when using the serger.
